Yarn Bombing Fun!

January 25, 2022

Starting in July of 2021, I’ve been helping the Bombshells of Cincinnati with an installation in Washington Park called COSY CURIOSITIES. I was recruited by Judy Dominic to be a “sidekick” and assist with knitting and crocheting various components. Each week I would go to a certain porch and pick up a project kit containing yarn and a slip of paper with instructions like “knit or crochet a rectangle 18″ x 36″ with lots of texture” or “latch hook this piece between the black outlines.” One of my favorites included 3 big balls of yarn, a knitted heart pattern and instructions to “make as many hearts as possible.” And I never knew how my pieces of the project fit into the whole. I would drop off finished pieces and pick up kits each week. The whole experience was mysterious and magical and it was just what I needed through the ups and downs of the pandemic. People would ask me what I was making, and I would say “I don’t know!” and tell them about the magical porch and the Bombshells.

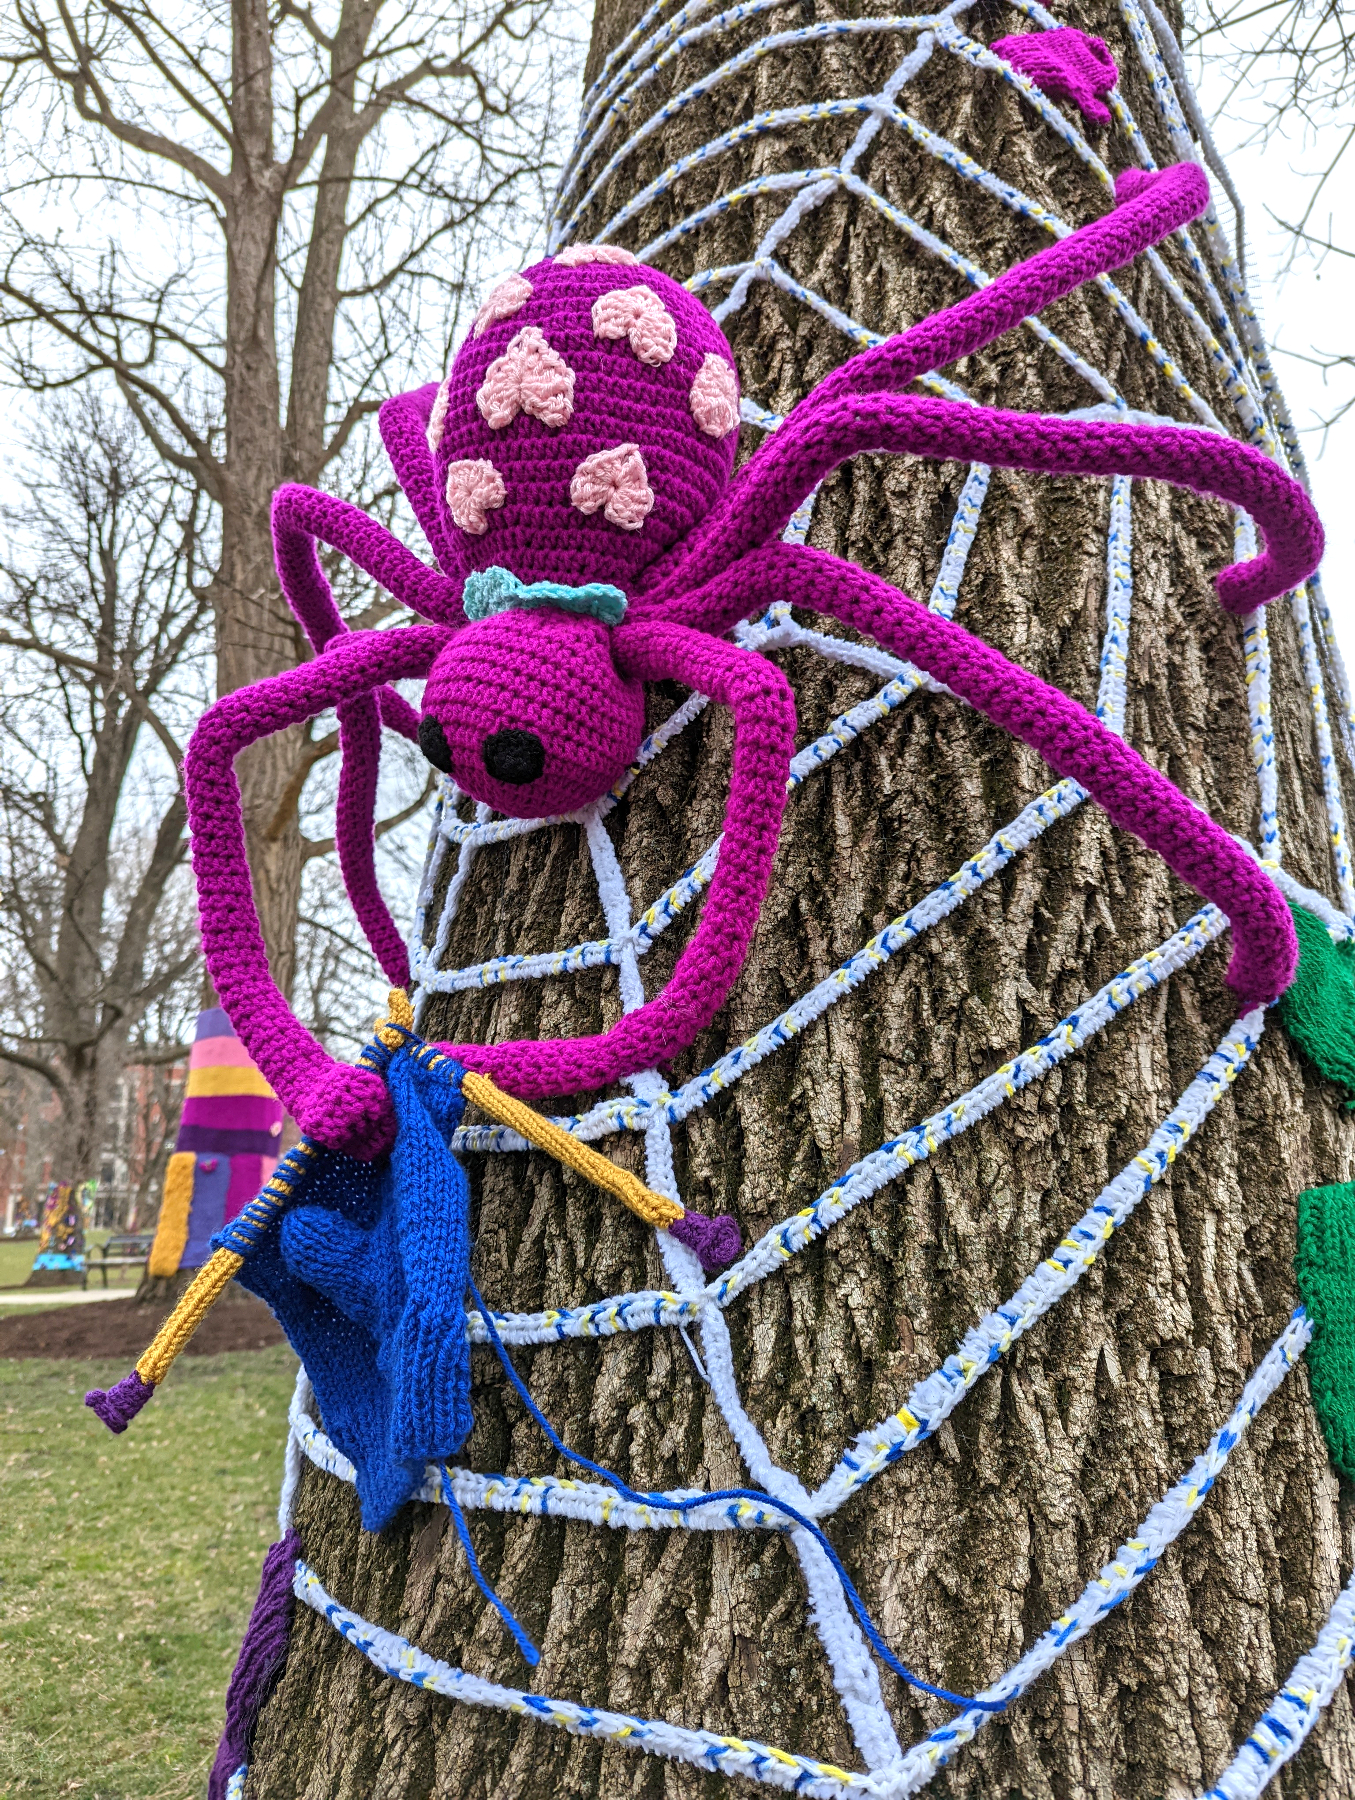
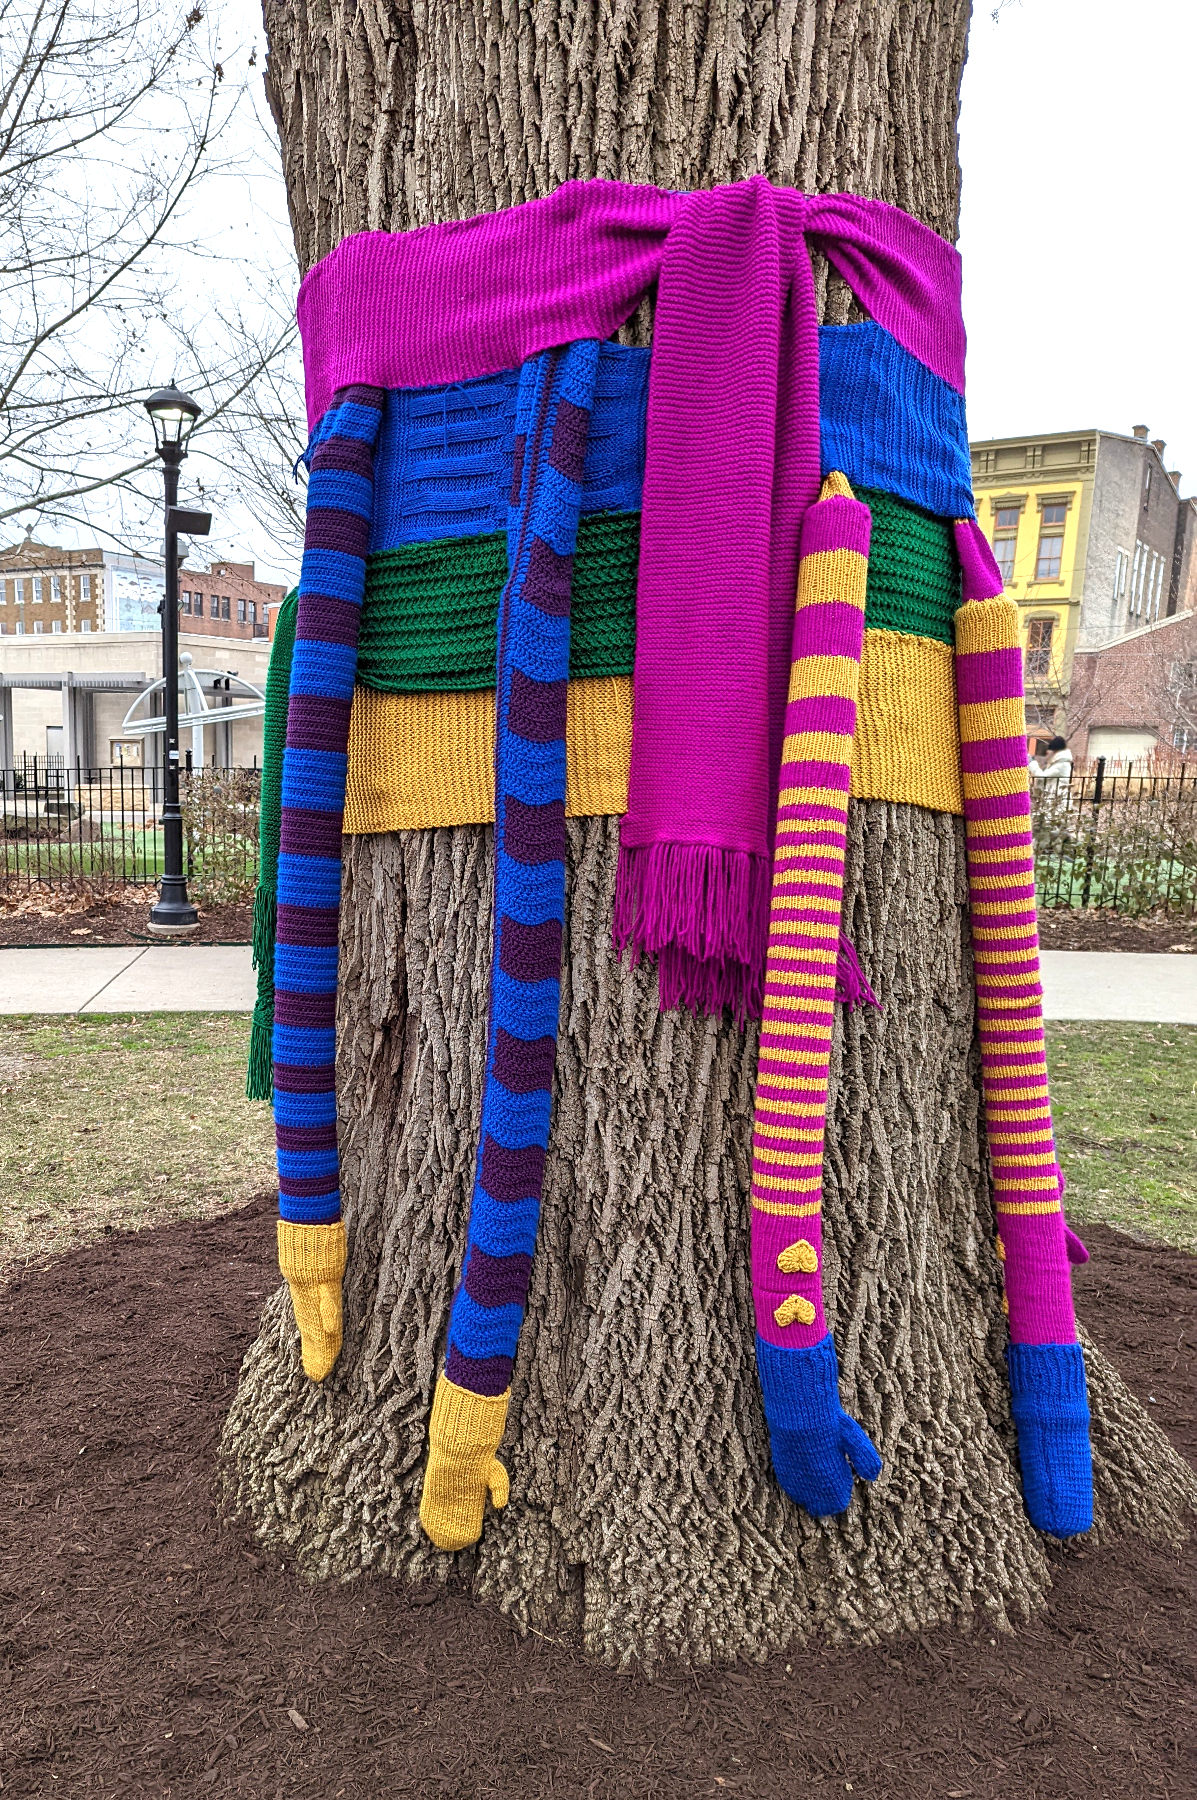
The COSY CURIOSITIES art installation is currently up and was timed to cheer things up for Mittenfest–an event featuring craft beers, food trucks, a dj and more (February 19 and 20th). The Bombshells also recruited local makers to create hundreds of pairs of mittens to donate give away to charity groups that work with people in need.

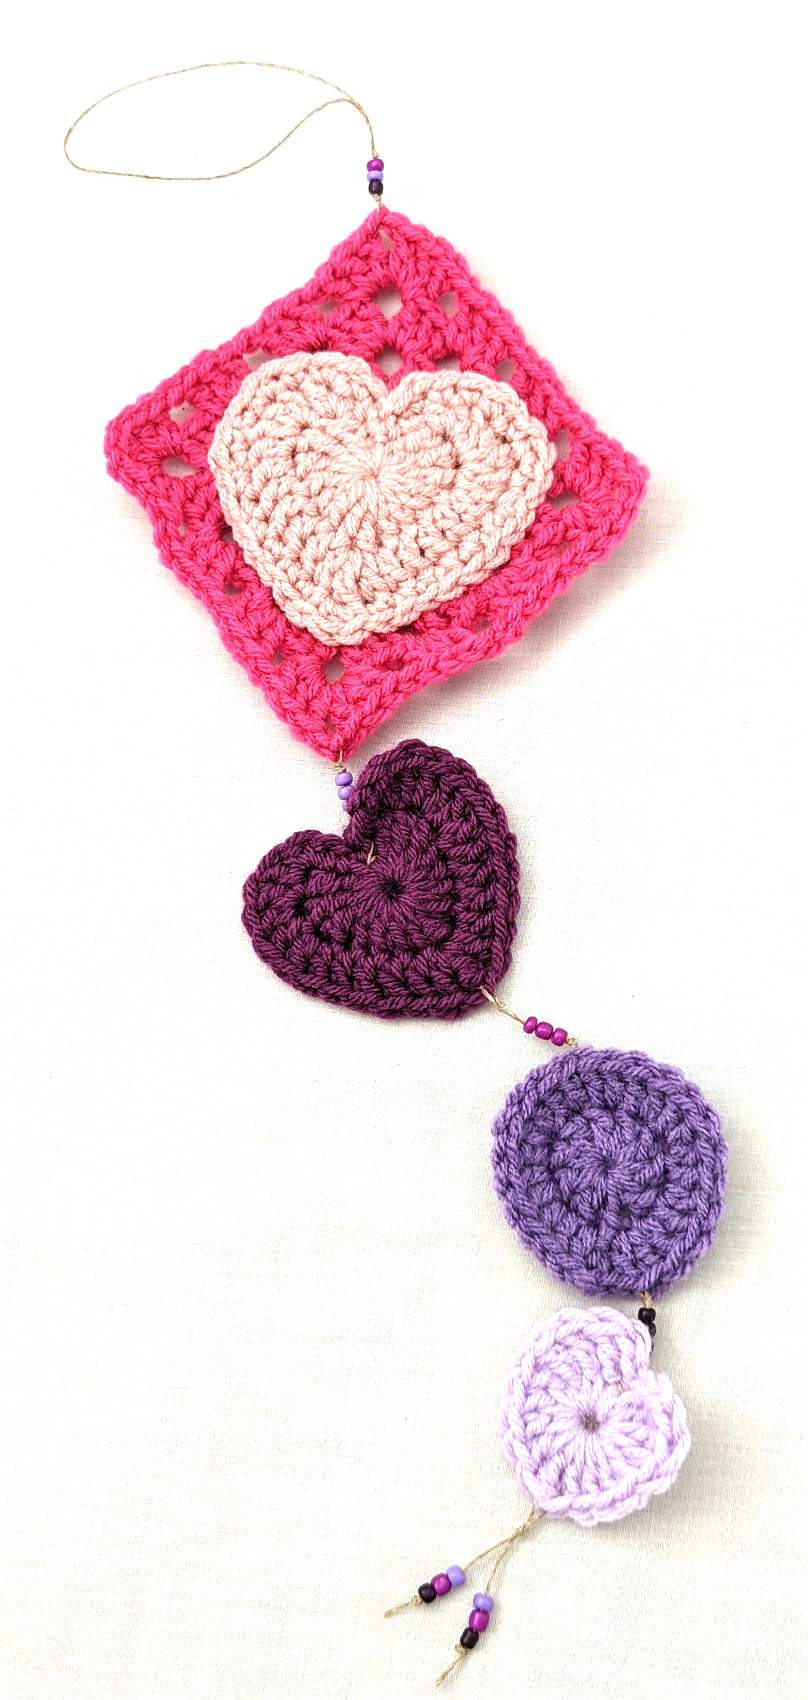
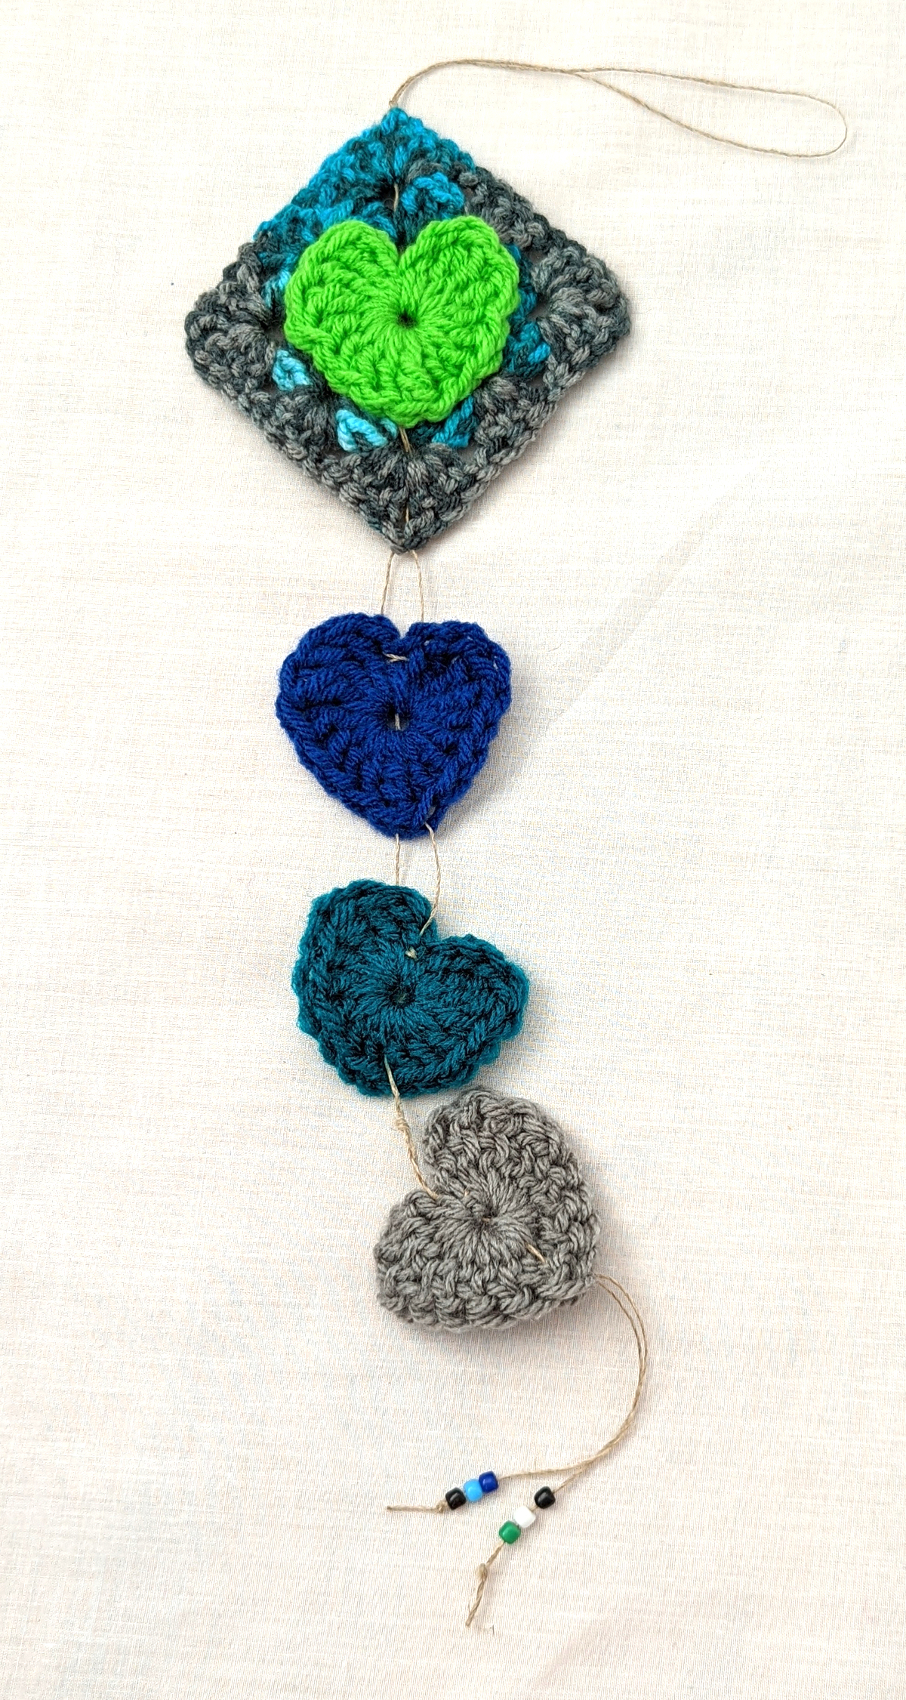
I have been making Yarn Bomb Kits to sell. These kits are pre-made, ready to install bits of whimsy and delight and I hope they go out into Cincinnati and make many people smile! They are perfect for non-yarn artists to brighten up their homes, yards or neighborhoods. Of course if you knit or crochet, do your own and brighten up Cincinnati this winter! The Fiber Art Market scheduled for Jan. 29 & 30 was cancelled, so I’m not sure where or when I will be selling them, but I’ll edit this post when I know!

Here’s what you need to know:

  1. Choose your location. You can install on many different surfaces. I suggest starting easy with a pole or chain fence (chain link will give you the most options, but wrought iron or narrow pickets or farm fencing could work too. Choose a location near your home or work–you want to be able to check on your piece. You can re-secure it if it’s sagging or falling off and remove it when it gets to be more of an eyesore than an eye-delight.
  2. Get permission–it’s a good idea to ask if possible. The property owner may remove it or ask you to install it in a certain way so you don’t cause damage. Be especially careful of trees. Prolonged covering of trees with slow-to-dry knitted/crocheted fabric can cause fungus to grow. It’s safest to dress your own trees (for a short time period) or get permission before dressing someone else’s tree. Or just decorate poles.
  3. Installation – this depends a lot on the size of your piece and the surface you’re attaching it to. You can sew or tie your pieces onto fences, trees and posts, or use plastic cable ties.

We Went to Japan!

September 17, 2019

In March 2019, Janie and I had the good fortune to stay with Bryan Whitehead in Fugino, for a week studying traditional Japanese shibori, katagome, and indigo dyeing. Bryan, a Canadian, has spent the last thirty years living in Japan learning from Japanese textile artists and perfecting teaching these arts to both Japanese and foreign students.

Bryan weaving on his Japanese loom.

Bryan’s teaching style is demanding yet supportive and encouraging. He wants his students to appreciate how labor intensive Japanese methods are, yet simultaneously, he emphasizes the beauty in imperfection and the surprises the dye brings.

An indigo flower in Bryan’s indigo vat. He grows and harvests the indigo. Then he ferments it until it is ready to be made into dye.

Our main pieces took us about 40 hours to stitch, another half day to pull the stitches tight, most of a day to dye and rinse (in a river!), and another day or so to rip out the stitches. We also stitched several small pieces to learn various techniques.

Pulling the stitches tight in preparation for dyeing

Staying in Bryan’s gorgeous 150 year old silk farm house is akin to being in a living homage to historic Japanese textile arts. Everything is interesting. Everything is practical. There is beauty everywhere.

Bryan’s students benefit from his long relationships with Japanese traditional craftspeople. Noguchi san, is one of the few textile craftsmen designated “living treasures.” Noguchi san continues his family’s 400 year old katazome business. His son is the 17th generation to produce the double sided paste resist summer cotton kimono. Meeting Noguchi san and his family and watching them do what they have done for 400 years was one of the highlights of our visit. What an honor to learn from Noguchi san and to see Bryan learning from him too.

Follow Bryan Whitehead @japanesetextileworkshop.blog to immerse yourself in his world.

Here are some more images from our extraordinary visit to Japan.

And some images of ikat from around Japan. Both the warp and weft need to be dyed specifically to create the patterns.

Shibori began in Arimatsu as a way to give a “calling card” of sorts to samurai traveling on the Tokaido. Instead of a card, the visitors were given hand towels in patterns that were resist dyed. Some images from the Shibori-Kaikan in Arimatsu.

Our trip to Japan was almost three weeks, but barely enough time to introduce us to its sublime beauty. We were talking about returning before the plane was airborne. If you can, GO.

Toby

Harrisville, New Hampshire

October 4, 2017

Close your eyes and picture an ideal brick New England village nestled into the hills of Southern New Hampshire. Yarn has been spun here since 1794. The water running under the mill buildings is clear. Wild flowers line the pond shores and the one road that winds through town. People are friendly and congregate at the general store. Fantasy? No. Welcome to Harrisville, New Hampshire.


I recently had the good fortune to study with Jason Collingwood in Harrisville, one of only a handful of woolen mills towns left in the USA. While I could write volumes about Jason’s work and his many talents, he deserves his own entry, which I promise to write soon.


Our workshop was held in a meticulously restored mill building. Parts of our curriculum were tours of the spinning mill and the loom building workshop along with informal history lectures by members of the Colony family. The previous generation of the Colony family purchased the mill in the mid-1800s and the family members have operated the woolen mill ever since. Although his father and uncle were forced to close their doors in 1970 due to dwindling demand, John (Chick) Colony III, fresh from business school, saw a way to preserve the historic way of life in Harrisville. He raised the necessary funds to form Historic Harrisville Inc., a non-profit, which in turn was able to restore the 15 original mill buildings in town. In 1971, John then founded Harrisville Designs to continue the town’s historic textile tradition. Now Harrisville Designs leases space from Historic Harrisville Inc. in order to keep that organization viable. In 1977 the village of Harrisville was designated a National Historic Landmark. It is recognized as the only 19th century textile village in America that survives in its original form. Clearly Harrisville is a piece of living American history.


As a long time fan of Harrisville yarn I was particularly thrilled to see the wool-spinning mill. Here is what I learned and saw:


Fleece arrives “dyed in the wool”.


It is then sorted, carded, and spun the first time.


The yarn is spun again onto individual spindles.


Then it is coned.


And then skeined.


The final step is to wind the yarn onto cardboard cones to begin to prepare it for shipping.


Mine is a simplified rendition of the process, but I hope that you can gather how much effort goes into producing this exquisitely beautiful, truly fine yarn.


In addition, Harrisville Designs builds its looms on-site. This is Chick Colony showing us a pile of hard maple destined for loom kits. They make several types of looms including a very unique rug loom designed by Peter Collingwood that has shaft switching capabilities. (More on shaft switching later.) Chick’s father invented machinery needed to build that rug loom which is still in use in the workshop today.


I give many thanks to Chick, Pat, and Nick Colony for my Harrisville experience. I have a deep appreciation for what they have accomplished. Plus I thoroughly enjoy weaving and knitting with their yarn. I am eagerly awaiting the “souvenirs” I shipped home.


Toby

My Norwood Loom

September 4, 2017

I weave on several types of looms. At the moment, my favorite is a 50 inch width cherry handmade Norwood jack loom. The original owner’s manual written in the 1950’s calls these looms “The Weaver’s Easel”.


Norwood Looms originated in Cadillac, MI. Wallace McGarr, who learned furniture making during the Great Depression and his wife, Melvina moved the company in 1950 to Baldwin in Northern Michigan. According to his grandson, Mike McGarr, Wally wanted to call the company “Northwood Looms” after the beautiful forests in the area. The name was already taken so he improvised with “Norwood Looms”.


For the next 21 years Wally built the looms and accessories out of solid cherry while Melvina operated a weaving/gift shop and provided weaving instruction. Norwood Looms became equated with hand weaving excellence.


In 1974 the McGarrs sold Norwood Looms to Ted and Nancy Johnson who moved the woodworking shop to larger quarters in neighboring Freemont, MI. (Fun fact: The Johnson’s made the original Cranbrook countermarche loom which they later sold to Schatt.) The Freemont loom builders worked under the direction of Wally McGarr for several months before taking the helm. All production ceased in 1996 when the Norwood name was sold to Webs and production moved overseas. Ash or Birch became the material of choice.


So, if you come across a Norwood loom made of cherry, you know it predates 1996. The location on the label will tell you if it was made by the McGarrs or by the Johnsons.


When I saw my loom listed for sale my son was home for a few weeks between graduating college and beginning graduate school. I knew he would never live home again and I relished the time. We took a 13 hour road trip in one day to get my loom. Thirteen hours of my 22 year old son all to myself! He was a champ. That crazy road trip, the insanity of driving 13 hours for (albeit) a special loom, and his willingness to do it with me makes the loom all that much sweeter. I often smile at the memory when I am weaving.


I appreciate that my Norwood was hand crafted by people who truly took pride in their skills and product. I feel that sentiment somehow translates from the loom to my weaving. When researching this post I contacted Mike McGarr to fact check. He is a metal artist in Michigan and is thinking about starting to build looms in his grandfather’s tradition. All I can say is fingers crossed.


Toby